CRS Online Forms User Manual
First you need to add your Financial Institution to the ITIES system.
To streamline the process, you can set up one or more organisations. An organisation is a group of FIs that have the same contact details and access is provided to the same people. It must also be regulated by the same authority (CBB or MOICT).
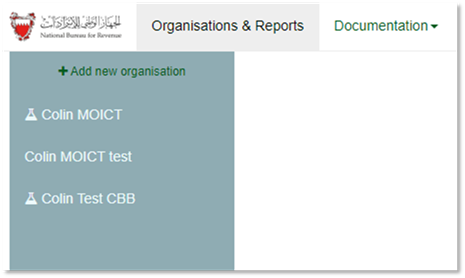
Click on Add new organisation and the following screen will appear.
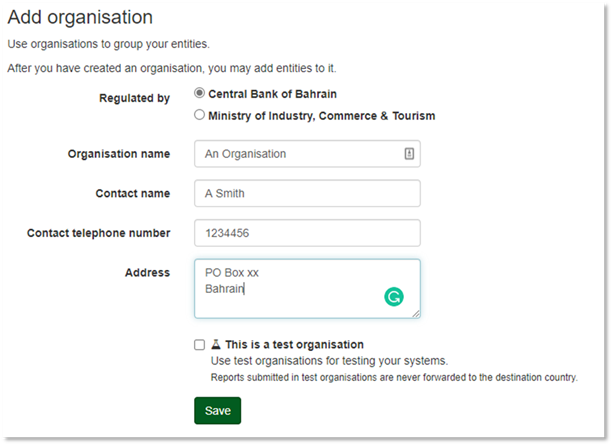
Select who you are Regulated by and complete the details.
Should you wish to test the system without sending any returns, click on “This is a test organisation” and the Test symbol will appear next to the name of the Organisation. Any FIs entered in Test Organisations will be able to accept test files only.
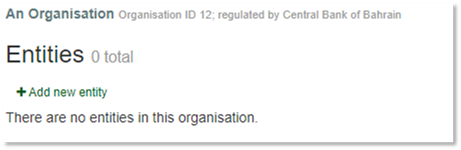
Once saved, you can then Add a new Entity
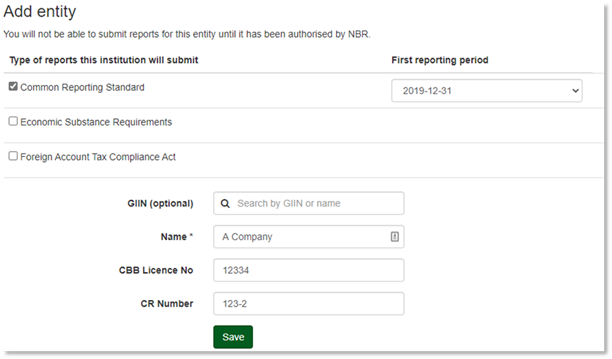
Adding a new Entity, you can select the reports the institution will submit and the first reporting period and enter the FI details.
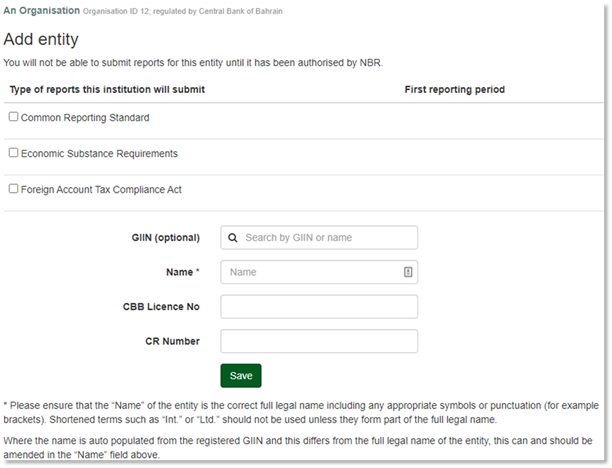
If you adding an Entity for FATCA reporting, you will be required to enter a GIIN number by searching for GIIN or Name. If you do not select FATCA reporting, the GIIN is optional.
If you are regulated by CBB, you will be asked for a CBB licence number.
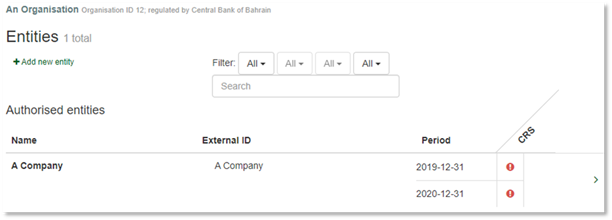
If this is an FI set up within a Test Organisation, you will immediately be able to continue. If this is an FI set up in a live Organisation, you will need to await CBB or MOICT authorisation before proceeding.
The FI appears in yellow until authorised.

It goes white once authorised.
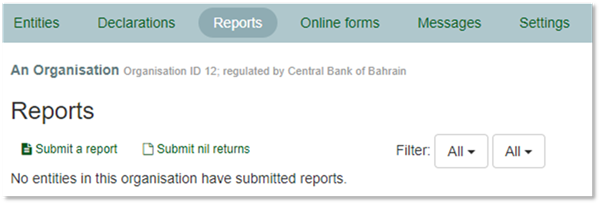
There are 3 ways you can enter data for CRS and FATCA
- You can use the API. This is a machine to machine based system which allows the electronic submission of the XML files. See the separate documentation for more information on this process.
- You can select Reports and manually Submit a Report. This is only applicable where the XML file has already been created and you wish to upload it into ITIES.
Here you can click on Submit a Report, select the Report type and browse to the file you wish to upload.
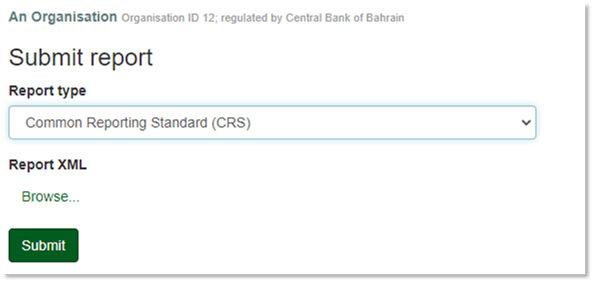
Then you press submit, the XML file will automatically be validated and any errors reported.
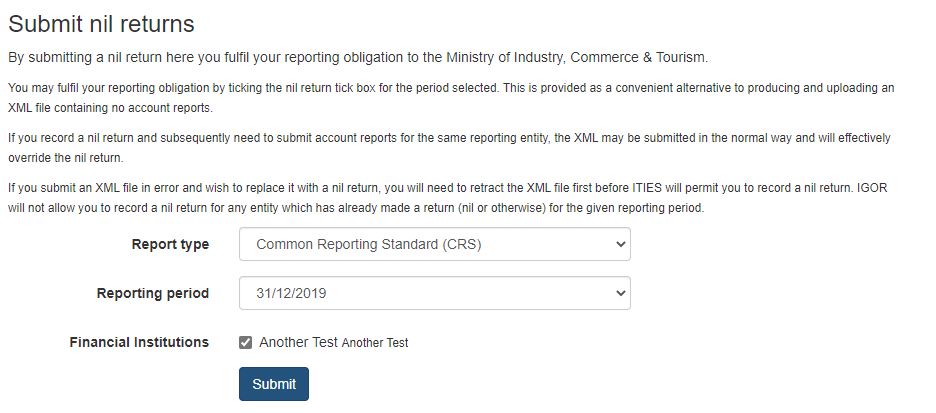
Submit nil returns
For CRS and FATCA, you can use ITIES to Submit a nil return. Please see the option under Reports above. This is next to the "Submit a report" link.
By submitting a nil return here you fulfil your reporting obligation to CBB or MOICT.
You may fulfil your reporting obligation by ticking the nil return tick box for the period selected. This is provided as a convenient alternative to producing and uploading an XML file containing no account reports.
If you record a nil return and subsequently need to submit account reports for the same reporting entity, the XML may be submitted in the normal way and will effectively override the nil return.
If you submit an XML file in error and wish to replace it with a nil return, you will need to retract the XML file first before ITIES will permit you to record a nil return. IGOR will not allow you to record a nil return for any entity which has already made a return (nil or otherwise) for the given reporting period.
This should be the calendar year in which the financial year or period for the entity ended. For example, if the entity’s financial year ended on 30/06/2020, you should select 31/12/2020.
Online Forms
ITIES provides an easy to use set of forms for CRS and FATCA. This is designed for small volume, simple returns and have been provided to assist the smaller businesses.
Please do not use the forms for more than 500 accounts per return. You can submit multiple returns, so it is preferable to submit say 10 returns with 100 accounts per return. If you have a large number of accounts and wish to automate the process, we strongly recommend you submit using the XML schema.
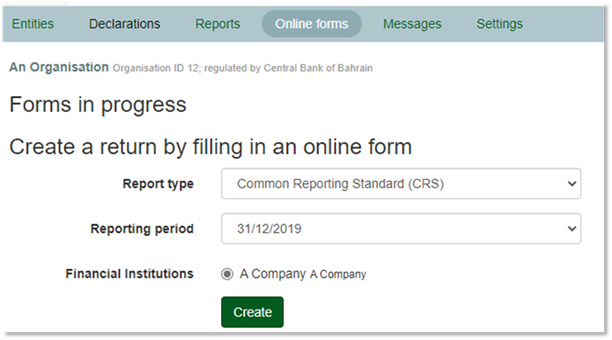
For this example, we have selected CRS for the reporting period ended 31/12/2019 for A Company
You are now in the Online Reports part of ITIES.
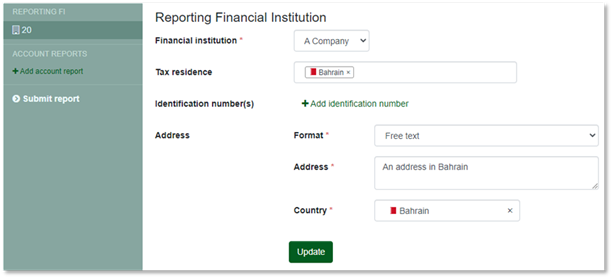
When you press Create, you complete the main information for the CRS report.
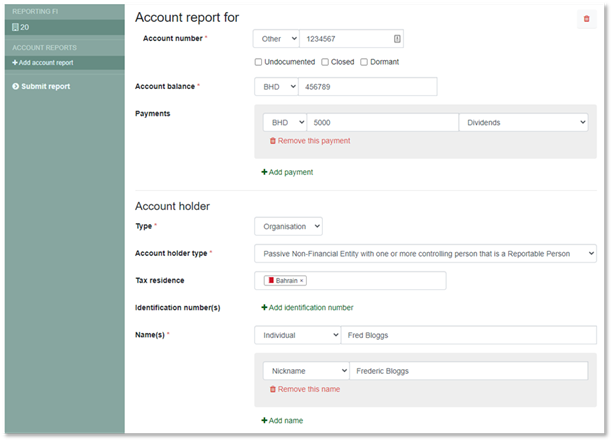
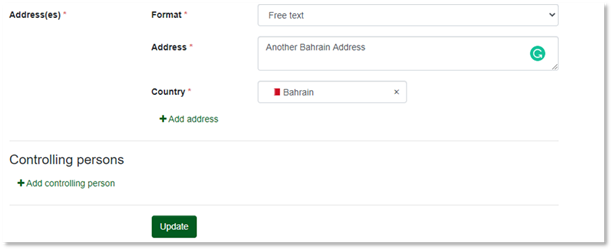
Enter controlling person information
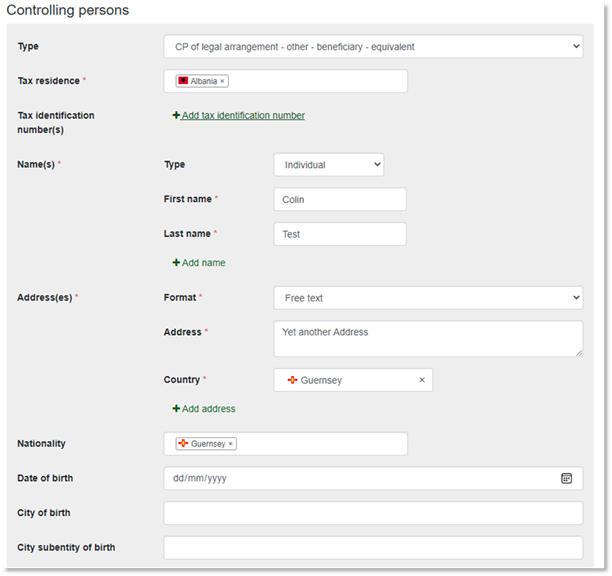
Enter additional controlling persons or Account Reports as required
When finished – submit report and press the Submit Report button

It will provide an error message if there are any errors with the report